Buyer-focused answer
Quick answer for buyers
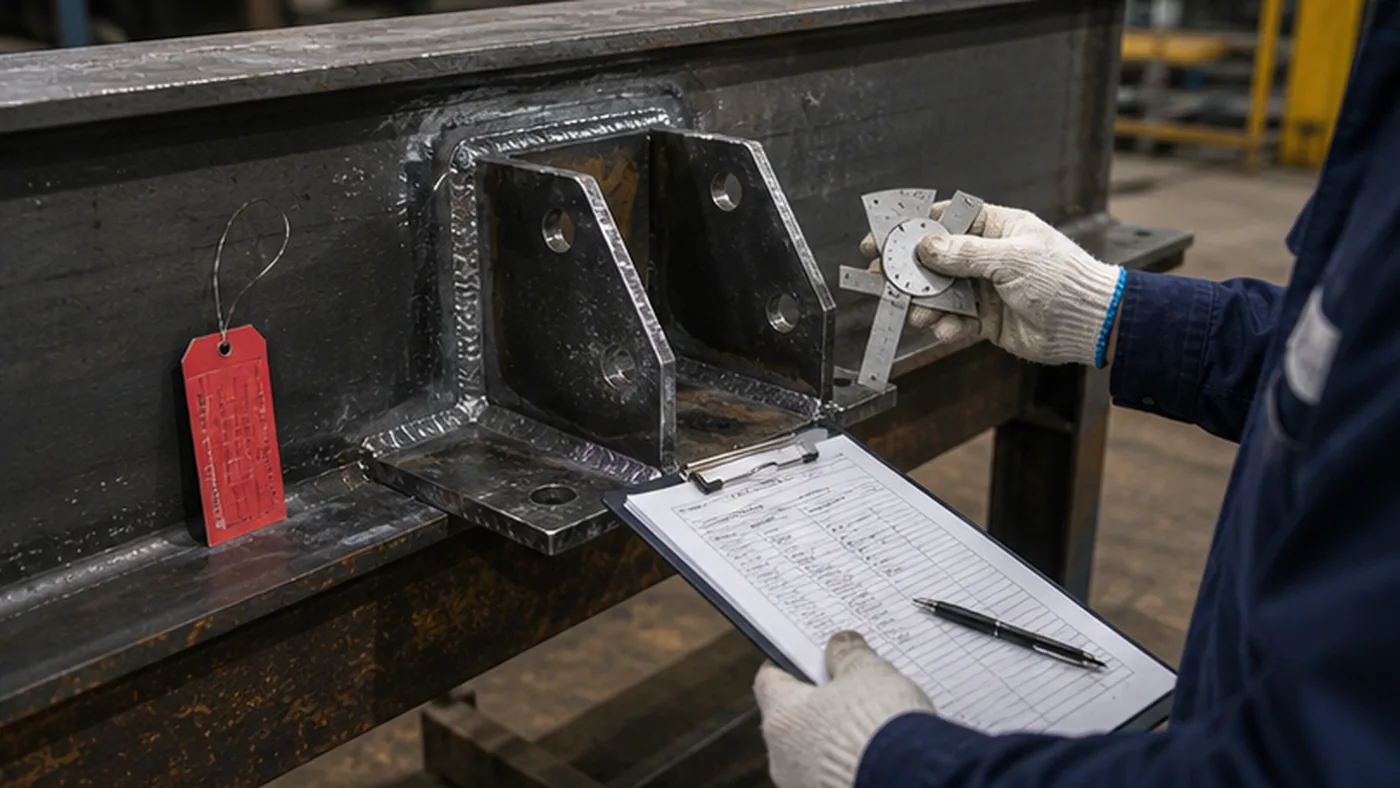
Steel structure post repair inspection checklist: verify repaired areas, measurements, NDT, coating records, NCR closeout, signatures, and release status.
Main question
What should EPC buyers check when using the steel structure post repair inspection checklist?
Quick answer
Steel structure post repair inspection checklist: verify repaired areas, measurements, NDT, coating records, NCR closeout, signatures, and release status.
When to use this page
Use it before fabrication release, before shipment, or before final handover when missing records can delay acceptance.
What to verify
Confirm the repaired item identity; Compare repair work with the approved method; Inspect the repaired area directly; Review required tests and measurements
Related next step
A steel structure post repair inspection checklist helps EPC buyers confirm that repaired components are actually ready for release. Repair completion does not automatically mean acceptance. The buyer still needs to verify the repaired area, compare the result with the approved repair method, review inspection records, and decide whether the item can be released, held, or accepted with condition.
This checklist applies after weld repair, coating repair, dimensional correction, packing damage repair, mark correction, site damage repair, or any repair linked to an NCR, quality hold, inspection comment, or delivery discrepancy.
1. Confirm the repaired item identity
Start by confirming the component mark, package number, drawing revision, defect reference, repair record, and inspection report. The inspection file should clearly connect the repaired area to the original NCR or inspection comment. If the repaired item cannot be identified, the release decision is not reliable.
Photos and inspection records should show the same component mark or a traceable package reference. This is especially important for export shipments where the site team may review the evidence weeks after the repair was performed.
2. Compare repair work with the approved method
The post repair inspection should verify that the completed repair matches the approved method. Do not inspect only the final appearance. Check whether the supplier followed the agreed procedure, used the correct materials, maintained required preparation steps, and completed any required intermediate inspections.
| Repair type | Post repair inspection focus |
|---|---|
| Weld repair | WPS reference, repair length, grinding, visual inspection, NDT result if required. |
| Coating repair | Surface preparation, repair material, DFT, curing, final surface, adhesion if required. |
| Dimensional correction | Re-measurement, tolerance comparison, connection fit, drawing revision. |
| Mark correction | Correct mark, label durability, packing list update, photo evidence. |
| Packing damage repair | Protection restored, small parts secured, bundle or crate label confirmed. |
3. Inspect the repaired area directly
The inspector should review the exact repaired area, not a nearby or general component photo. For visual checks, confirm surface condition, cracks, deformation, exposed steel, poor grinding, weld defects, coating holidays, or remaining damage. For dimensional repair, verify measurements after repair, not before repair.
If the repair is covered by paint, insulation, fireproofing, or packing before final inspection, the buyer should request intermediate evidence showing the repair before it became hidden.
4. Review required tests and measurements
Post repair inspection often requires more than visual evidence. Depending on the defect, the buyer may need dimensional checks, NDT reports, coating DFT readings, galvanizing repair thickness, bolt fit verification, or packaging re-check records. The report should state pass, fail, or conditional status.
If the test requirement was defined in the repair method or project quality plan, missing test evidence should block closeout until the record is provided or formally waived by the correct authority.
5. Confirm NCR and quality hold status
If the repair was connected to an NCR or quality hold, the post repair inspection should confirm whether the NCR can be closed and whether the hold can be released. The inspector should not mark the item released if the NCR remains open for missing evidence, pending signatures, or repeated defect review.
For conditional release, record the remaining condition, owner, due date, and evidence required after release.
6. Check final photos and document package
Final photos should show the repaired area after inspection and should be stored with the repair record. The document package may include approved repair method, before and after photos, inspection report, measurement sheet, NDT report, coating record, NCR closeout, and final release note.
Evidence should be named and organized so the site team or owner can retrieve it without searching through unrelated emails.
7. Decide final release status
The inspection result should end with a clear status. Avoid vague wording such as "seems okay" or "supplier confirmed." Use controlled status labels that guide the next step.
| Status | Meaning | Next action |
|---|---|---|
| Released | Repair passed inspection and required records are complete. | Update NCR, quality hold, and release file. |
| Released with condition | Repair is acceptable but a controlled item remains open. | Record owner, due date, and evidence required. |
| Re-inspection required | Evidence is incomplete or result is uncertain. | Hold release until inspection is repeated. |
| Repair rejected | Repair failed or does not match the approved method. | Issue new disposition or corrective action. |
| Transferred to site | Remaining item will be handled at site with approval. | Send site instruction and acceptance record. |
8. Include post repair inspection in handover
When a repaired component is shipped or released to site, the post repair inspection record should be included in the handover package if the issue may be reviewed again. This prevents the site team from reopening a repaired issue due to missing context.
The handover note should identify the component mark, repair reference, final status, and any remaining instruction. If a repair was accepted under concession, link the concession record to the post repair inspection file.
9. Track repair inspection failures
A failed post repair inspection is a supplier performance signal. Track whether repairs fail because of poor method approval, incomplete photos, inadequate workmanship, missing re-inspection, repeated coating damage, or weak document control.
Repeated failures should lead to corrective action, stronger hold points, or tighter release requirements in future batches.
Warning signs
- The repair method was approved, but the completed work does not match it.
- Final photos do not show the actual repaired area or component mark.
- Required NDT, DFT, dimensional, or visual inspection records are missing.
- The NCR is marked closed while quality hold status remains open.
- The item is released by supplier statement without buyer or inspector acceptance.
- Repeated repair failures are not escalated into corrective action.
Scope boundary: perform the physical reinspection
This checklist is for the inspector deciding whether the completed repair matches the approved method and acceptance criteria. It focuses on direct examination, dimensions, weld or coating checks, required tests, and the accept-or-reject record. Collecting files alone is not sufficient.
- Inspect the repaired area and adjacent material against the approved repair instruction.
- Record measured results and test references, not only a general statement such as repair completed.
- Reject or hold when the physical result cannot be verified, even if the evidence folder appears complete.
Buyer note
Post repair inspection is the point where repair work becomes a release decision. The buyer should be able to see the original issue, approved method, completed repair, inspection evidence, closeout status, and final release decision in one traceable package.
Post-erection inspection controls for repaired components
The controls below preserve the detailed checks from the retired micro-checklists. Apply only the sections relevant to the component, contract, approved repair method, and project authority matrix.
Steel structure repaired component post erection inspection checklist
A steel structure repaired component post erection inspection checklist helps EPC teams verify that a repaired component remains acceptable after installation. A component can pass repair inspection, receiving, storage, and erection release, but final installation can still expose fit-up issues, coating damage, handling marks, missing touch-up, or unresolved conditions that must be closed before turnover.
This checklist is written for EPC quality teams, site inspectors, material controllers, erection supervisors, and document controllers. It focuses on the final inspection link between repair release and project closeout, not on general steel erection safety or construction method control.
1. Identify the installed repaired component
The inspection record should identify the installed component precisely. Use the component mark, gridline, elevation, bay, drawing revision, repair reference, NCR number, and erection release record. The inspector should be able to prove that the inspected installed item is the same repaired item released from storage.
- Component mark and repaired area are visible or traceable in the inspection photo set.
- Installed location matches the erection drawing and release record.
- NCR, repair register, concession, or repair evidence reference is listed.
- Inspection date, inspector, erection area, and responsible site team are recorded.
- Any field modification after release is identified separately.
For the previous control point, compare with the repaired component erection release checklist.
2. Confirm repaired area condition after erection
The repaired area should be checked after lifting, positioning, bolting, alignment, and temporary support removal. Damage may appear during erection even if the component arrived and stored correctly.
| Repaired area | Post erection inspection focus |
|---|---|
| Coating or galvanizing repair | Check abrasion, exposed steel, rust staining, edge damage, and required touch-up. |
| Welded repair | Check visible condition, no new cracks, no erection damage, and inspection record linkage. |
| Straightened or dimensional repair | Confirm fit-up, alignment, connection position, and no new deformation after erection. |
| Hole or connection repair | Check bolt fit, plate contact, washer seating, and no forced assembly evidence. |
For repair evidence before installation, use the steel structure repair evidence checklist.
3. Check whether release conditions were closed
If the repaired component was released with conditions, those conditions must be reviewed after erection. The inspection should show whether the condition is closed, transferred, still open, or blocking turnover.
- Site touch-up completed and inspected.
- Post-erection photo evidence taken from the required angles.
- Owner, engineer, or quality signature completed if required.
- Temporary hold removed or carried into a controlled punch item.
- Updated drawing, NCR closeout, or concession record filed.
For hold control, connect the inspection result to the site quality hold checklist.
4. Review bolting and connection impact
A repaired component may affect bolting or connection inspection if the repaired area is near plates, holes, brackets, or member ends. The inspector should not review the repair in isolation if the repair area interacts with final connection quality.
| Connection item | Inspection question |
|---|---|
| Bolt fit | Do bolts pass through without forced alignment or field enlargement? |
| Plate contact | Is the contact condition acceptable for the connection type? |
| Repaired hole | Does the final condition match the approved repair and drawing requirement? |
| Touch-up area | Is coating repair complete after bolting, tightening, or alignment work? |
5. Capture final installed photos
Final photos should show the installed component, repaired area, component mark if visible, and surrounding connection or grid location. A close-up photo alone is usually not enough because later reviewers may not know which installed item the photo represents.
- Wide photo showing the component in its installed location.
- Close-up photo of the repaired area after erection.
- Photo of connection, bolt area, coating touch-up, or affected detail where relevant.
- Photo file name linked to component mark, gridline, and inspection date.
- Reference to the original repair photo set for before and after comparison.
For photo discipline, use the delivery photo checklist as a general evidence standard.
6. Decide the post erection inspection status
The inspection record should end with a clear status. Avoid vague comments such as "installed" or "checked." The status should show whether the repaired component is accepted after erection or still needs follow-up.
| Status | Meaning |
|---|---|
| Accepted after erection | Repaired area and related conditions are acceptable for closeout. |
| Accepted with punch item | Minor item remains but does not block the next work stage. |
| Touch-up required | Coating, galvanizing, or surface repair must be completed and photographed. |
| Hold remains | Inspection, engineering review, or owner approval is still required. |
| New issue opened | Post erection condition created or revealed a new discrepancy. |
7. Update quality and site records
After post erection inspection, update the related registers so the same repaired item is not repeatedly questioned. This includes the repair release register, NCR closeout record, site issue log, quality hold log, punch list, and area handover file.
- Repair register shows post erection inspection status.
- NCR closeout includes installed photos if required.
- Site issue log shows conditions closed, transferred, or still open.
- Quality hold log shows release, continued hold, or new hold reason.
- Turnover file includes final evidence for owner review.
For closeout evidence, review the steel structure NCR closeout evidence checklist.
8. Use a compact post erection inspection register
A compact register helps EPC teams track repaired components after they are installed. It should not duplicate every repair record, but it should show enough information to prove final status.
- Component mark, installed location, repair reference, and erection release reference.
- Inspection date, inspector, photo folder, and related drawing revision.
- Repaired area condition, connection impact, touch-up status, and final status.
- Open condition, owner, due date, and closeout evidence.
- Final file location for turnover or owner review.
Red flags after erection
- The repaired component is installed, but no post erection photo exists.
- Release conditions were accepted before erection but not checked after erection.
- Coating repair is damaged during bolting or alignment and not reopened.
- The repair record cannot be matched to the installed location.
- A quality hold remains open while the component is already included in turnover.
- New field damage is hidden inside the original repair closeout record.
Buyer note
Post erection inspection gives EPC buyers the last evidence point for repaired components. It confirms that the repair remained acceptable after handling and installation, and it gives the document team a clean basis for NCR closeout, punch item control, hold release, and final turnover.
Buyer follow-up questions
How should buyers use this page?
Use it as a practical review aid for steel structure post repair inspection checklist. The page helps the buyer confirm what must be checked, what evidence should be requested, and which follow-up actions should be closed before the package moves to the next procurement step.
When should this review happen?
Use it before shipment release, final document turnover, or owner handover when traceability and acceptance records need to be closed.
What evidence should be kept?
Keep the records that prove the decision, especially certificates, heat numbers, inspection records, NCR closure, coating reports, signatures, revisions, and final handover files. Photos, comments, approvals, open issues, and closeout notes should stay linked to the relevant drawing, supplier reply, shipment, or handover record.
How to use this checklist
Check this buyer-side checklist against the contract, approved drawings, owner requirements, engineer instructions, and the current edition of every project-specified standard. See the editorial and source review process.